
Add a user
Add a person to the workspace with one role at one place. You need the permission Add users. To give the role in the same step, you also need the permission Give and remove roles.
Before you start
- You can give only a role that you hold yourself, at the same place or a smaller place. The dialog shows only these roles and places.
- There are two types of account. A user who signs in with e-mail gets an invitation e-mail. A user without e-mail signs in with a username and a temporary password.
- A user without e-mail cannot hold an administrative role.
- Without the permission Give and remove roles, the dialog does not show Role and Where. The user gets no role. Ask a person with this permission to give the role. Until then, the user can sign in but sees no data.
Add a user who signs in with e-mail
- Select Users.
- Select New user.
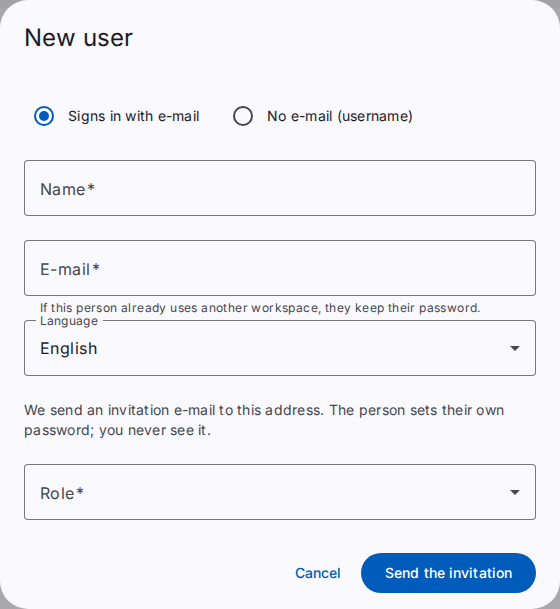
- Select Signs in with e-mail.
- Type the name of the person in Name.
- Type the e-mail address in E-mail.
- Select the language in Language.
- Select the role in Role.
- Select the place in Where.
- Select Send the invitation.
- If the app shows Confirm it is you, type your password in Password. If the dialog also shows Code from the app, type the code. Then select Confirm.
The user shows in the list with the status Invited. The person opens the link in the e-mail and sets a password. You never see this password. The link is valid for 7 days. If the person already uses another workspace, the person keeps the same password. See Accept an invitation.
Add a user without e-mail
- Select Users.
- Select New user.
- Select No e-mail (username).
- Type the name in Name.
- Type the username in Username. Use 3 to 32 lowercase letters, digits, dots, dashes or underscores. Start with a letter.
- Select the language in Language.
- Type a password of at least 12 characters in Temporary password. Do not use a common password, for example
password123. You can also select the dice button to get a suggested password. - Select the role in Role.
- Select the place in Where.
- Select Create user.
- If the app shows Confirm it is you, type your password in Password. If the dialog also shows Code from the app, type the code. Then select Confirm.
Caution: The page shows the temporary password one time only. Record the password before you leave the page.
- Give the username and the temporary password to the person yourself.
The user must change the password at the first sign-in.
Send the invitation again or cancel it
Use these actions for a user with the status Invited.
- Select the menu button (three dots) on the card of the user.
- Select Send the invitation again.
- Select Send the invitation again in the dialog.
- If the app shows Confirm it is you, type your password in Password. If the dialog also shows Code from the app, type the code. Then select Confirm.
The person gets a new e-mail. The link in the earlier e-mail stops working.
To cancel the invitation:
- Select the menu button (three dots) on the card of the user.
- Select Cancel the invitation.
- Select Cancel the invitation in the dialog.
- If the app shows Confirm it is you, type your password in Password. If the dialog also shows Code from the app, type the code. Then select Confirm.
The system removes the person from the workspace, and the link stops working. You can invite the same person again later.
Result
A message at the top of the page tells you what the system did. The new user shows in the list.
The user limit of your plan
An open invitation counts as a user of the plan of your workspace. When the user limit is full, the system refuses a new invitation. Cancel an invitation that is not necessary to get a place free. Refer to See the plan and the usage of your workspace.